Showing posts with label craft. Show all posts

Friday, March 15, 2013

#Craftcation...Getting Ready

 
Via Craftcation

Let the countdown begin, T-minus 6 days and counting. I have to admit that I am super stoked about this trip. Just a couple of reasons why...

1. Leavin' on a jet plane- Austin to So Cali
2. Bestie will be there with me
3. 4 days of awesome classes to grow my business
4. Food and Wine tour- enough said
5. Craft show and shopping
6. The BEACH
7. 3 days away from the office
8. Great networking opportunities
9. Hotel beds - I love these things
10. New clothes
11. Airport Starbucks

I love that we are traveling far enough to fly. The idea of being able to sit back, listen to music, maybe read a book or just talk without the distraction on other cars on the road is a priceless part of this trip for me. Clearly you can tell from the above mentioned list that there will be plenty of fun taking place and not all work. My bags will be packed this weekend, I plan to spend a lazy Sunday, doing taxes laying out all of my outfits and packing. My go bag is almost ready, complete with my travel/conference must haves.
  
Toting it all around in this amazing bag from Eleventy-Five.com


Snacks: Beef Jerky//Red Vines//Nutella to Go!


                   Reading Materials: Be Mine//Cosmo {haven't read it in years}//Flea Market Style
              

One of the things I am most excited about is #5, I love a good craft show. The bestie and I regularly shop around Austin, but we love to look for something different on the occasion that we are out of town. We happened upon this Penelope Lane Boutique blog a while back and became followers. Then with Craftcation tickets purchased and airlines books we noticed that their Spring Boutique Event is the same weekend we are going to be in California! Even better its only an hour or so drive from our hotel. We can't wait to attend on Saturday and plan to shop until we drop. If you're in the area you should really check it out.


My amazing assistant The Fabulous Ashley worked extra hard this week making these adorable business card/gifts! I can't wait to take them to California and spread the love.


Make sure to follow us on Instagram for all of this crazy awesome fun! @lderrick #elledeedesign
or on Twitter at @elledeedesign
Pin It

Tuesday, June 12, 2012

DIY Teacup Candles

I had so much fun making the decorations for my brother and sister in laws wedding last week. Everyone in the family was gathered around kitchen counters and tables crafting {even the men}. I asked my SIL how many wedding magazines she had bought { I bought tons 3 years ago when I got married}. Amazingly she said none, someone had given it to her as part of a gift, she found everything on Pinterest.

Here is the first project I helped tackle, teacup candles to be used on the table decorations. ADORABLE.


SIL hunted down all of these adorable teacups and saucers from varying thrift shops and paid about 45 cents for each set. We picked up a package of wicks from Hobby Lobby for $2.69/dozen.

I hot glued the wicks into the bottom of each cup after washing them to get any dust off. {you might want to also hot glue the cup to saucer if you are gifting them to make it more complete, we did not since we needed to pack them up to take to venue}.


I used 2 boxes of plain candle wax from Hobby Lobby, each box was $4.99. You can use any sauce pan to melt your wax down, however for easiest clean up we purchased this special container for melting $14.99 and then we used a 40% off coupon.

I chopped the wax up into smaller chunks to speed along the melting process. Stirring it occasionally with a wood spoon.


After all of the wax was melted down I poured each cup full to the desired height and allowed them to harden.  After completely dry I snapped the wicks down to a safe length. 

We let ours sit out over night and loved the final results!


Original Concept Link


Linking up with:


Creations by Kara


http://www.findingfabulousblog.com/Photobucket

How to Nest for Less


Pin It

Thursday, June 7, 2012

DIY Diaper Motorcycle!

A few months back, I found a similar project to this on Pinterest. The pin that I found required floral wire and I was just not interested in something that complicated, so I created this diaper motorcycle!  I made on for my friend, Melissa, and then this one, for a co-worker of Jim's.

Here are some basic instructions:


What You Need!

1 Package of receiving blankets (I like to choose a set off of the person's registry.)
Thick sized ribbon (coordinating with blankets)
Diapers! (These are size three. I bought a large package and used approximately 60 diapers.)
1 baby food jar (empty)
1 pair baby socks
3 larger rubber bands
Smaller thin ribbon
1 toilet paper roll
Glue gun with 1 stick

Instructions

1. Take 18 diapers and overlap one another, forming a small round circle to form a wheel. Secure that diaper "wheel" with a rubber band around the whole thing.  Repeat with 18 more diapers. Then, take 24 diapers, and form the larger wheel.

2. Cover rubber bands with chosen ribbon and hot glue the ends together to make it stay.

3. Take one receiving blanket, fold into a triangle and then roll up to form the handlebars. By folding it into a triangle, it will be longer, enabling you to thread it through the largest wheel and joining the two ends up top. Secure with a rubber band.

4. To form the handle bars, I like to cut the toilet paper roll in half and form smaller rolls within the blanket to form stiffer handlebars. Once completed, they should stick out nicer and you can add the baby socks.

5. Take another receiving blanket and thread it through the big wheel and wrap it around the outer part of the other wheels, connect behind the big wheel by knotting.

6. Take one more receiving blanket and form a "seat" by folding. I simply tuck ends into middle hole of front tire where the other two receiving blankets are threaded through.
7. Finally, place baby jar facing outwards to form a "headlight" and tie smaller thin ribbon on handlebars to cover the rubber band.

One final option is to buy a stuffed animal to add to the gift that is "riding" the motorcycle.

This diaper cake is always a hit and actually pretty simple. Once you get the hang of it, you can probably assemble the whole thing within a half hour.

Pin It

Wednesday, June 6, 2012

Fancy Little Things: DIY Amazing Drawer Liners

Hello new friends! This is Aimee from Fancy Little Things. I am so lucky that Lani asked me to share a project with you this week! I have been blogging at FLT since we launched in March 2010. We have 8 authors covering topics from Marriage to Faith to Photography & Fashion. We have such a great time as a Christian Women's Magazine and I get to share DIY projects each Monday! Please stop by!

So, let's get started...

So, how many of you have ever purchased drawer liners for yourself? You know those expensive, scented ones that come rolled up in the long box with a pretty bow & label attached. I know I have certainly purchased them --- but ALWAYS FOR GIFTS, NEVER FOR MYSELF!!! I admire those of you that have spent between $20-$30 on a package of these, trimmed to size and put in your own drawers --- I just can't bring myself to doing it!

While I was flipping through 1 of my many favorite magazines preparing for this month's projects, I came across this page of "Things to do This Month" in March 2011's issue of Better Homes & Gardens. {Pardon the folded mess - but it's been tucked inside an envelope in my "Projects Journal"}


& when I first glanced at this page, I pulled it out thinking it was part of a drawer liner tutorial... this is when I glanced to the bottom left corner of the page and saw this:


Yes, do you see that price? $25 for a set of 6?? Do you know how many rolls of white paper I can buy for $25??!!!

So, onward we must go --- to the very tutorial that will save you lots of money & you'll have plenty of money to purchase a fancy bow to give this project to a friend!!

DISCLAIMER {before we begin}: Make sure you use paper ink only for stamping and let your paper dry overnight before use. I do not claim any responsibility for the ink passing to your clothing or other items!


List of Materials:

  • Paper roll... I used the kids Melissa & Doug Easel Paper, but have seen paper rolls for $1 at the Christmas Tree Shoppes!
  • Ink {I purchased mine for .60 a piece by using a coupon at AC Moore}
  • Stamp {I LOVE this stamp - again, used another coupon and purchased for $6. --- will use for MANY more projects}
  • Measuring tape, scissors, pen
 If you want to add scent...

  • Scented oil
  • Cotton swabs


Step 1: Measure the drawer you wish to line --- dresser drawer, utility drawer, closet or desk drawer! Measure the drawer size leaving two inches extra on each end for folding. Mark at the 2 inch march and fold under {this will help the liner from rolling under as you stamp & place in your drawer.


Step 2: Decide on a pattern and begin stamping. Press lightly on the ink pad and have fun...


Step 3: Let the paper liner hang or lay flat to let it dry overnight...


Step 4: Go on to the next drawer...


Step 5: Once the paper has dried overnight, rub your hand over the ink to be sure its set... then, place it in your drawer {or roll it up, add some ribbon & a tag and gift to a friend}.


Step 6: Dab some oil on the cotton swabs and place under the corner of your drawer liner.


Step 7: ENJOY!!! I love how the drawer liners look in my bedroom dresser... off to make some for my desk drawers!!!!


So, what do you think? Come visit us for some more!!

Pin It

Tuesday, May 15, 2012

DIY Jewelry Organizer

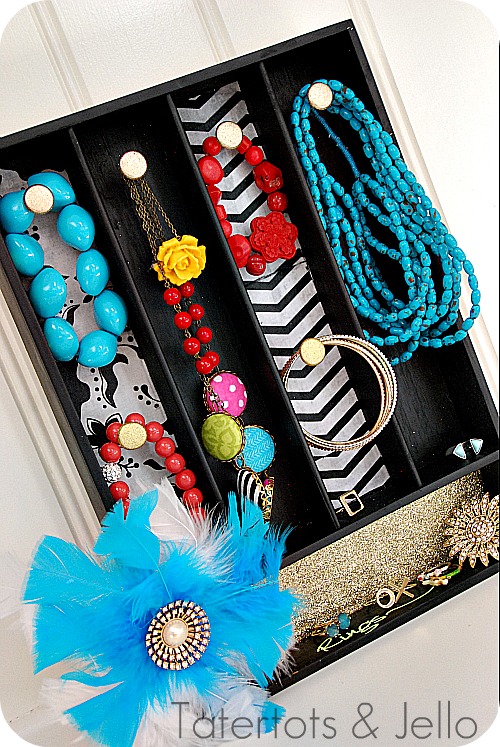
A few weeks ago I saw the most adorable craft on Tatertots & Jello a few weeks back. I knew I had to make one and still I was searching for a gift for the swap I was currently in I knew this would be PERFECT!


I saw a few others that told me this was going to be adorable!!!
Handmade by Jen ROCKED it with her version {HERE}


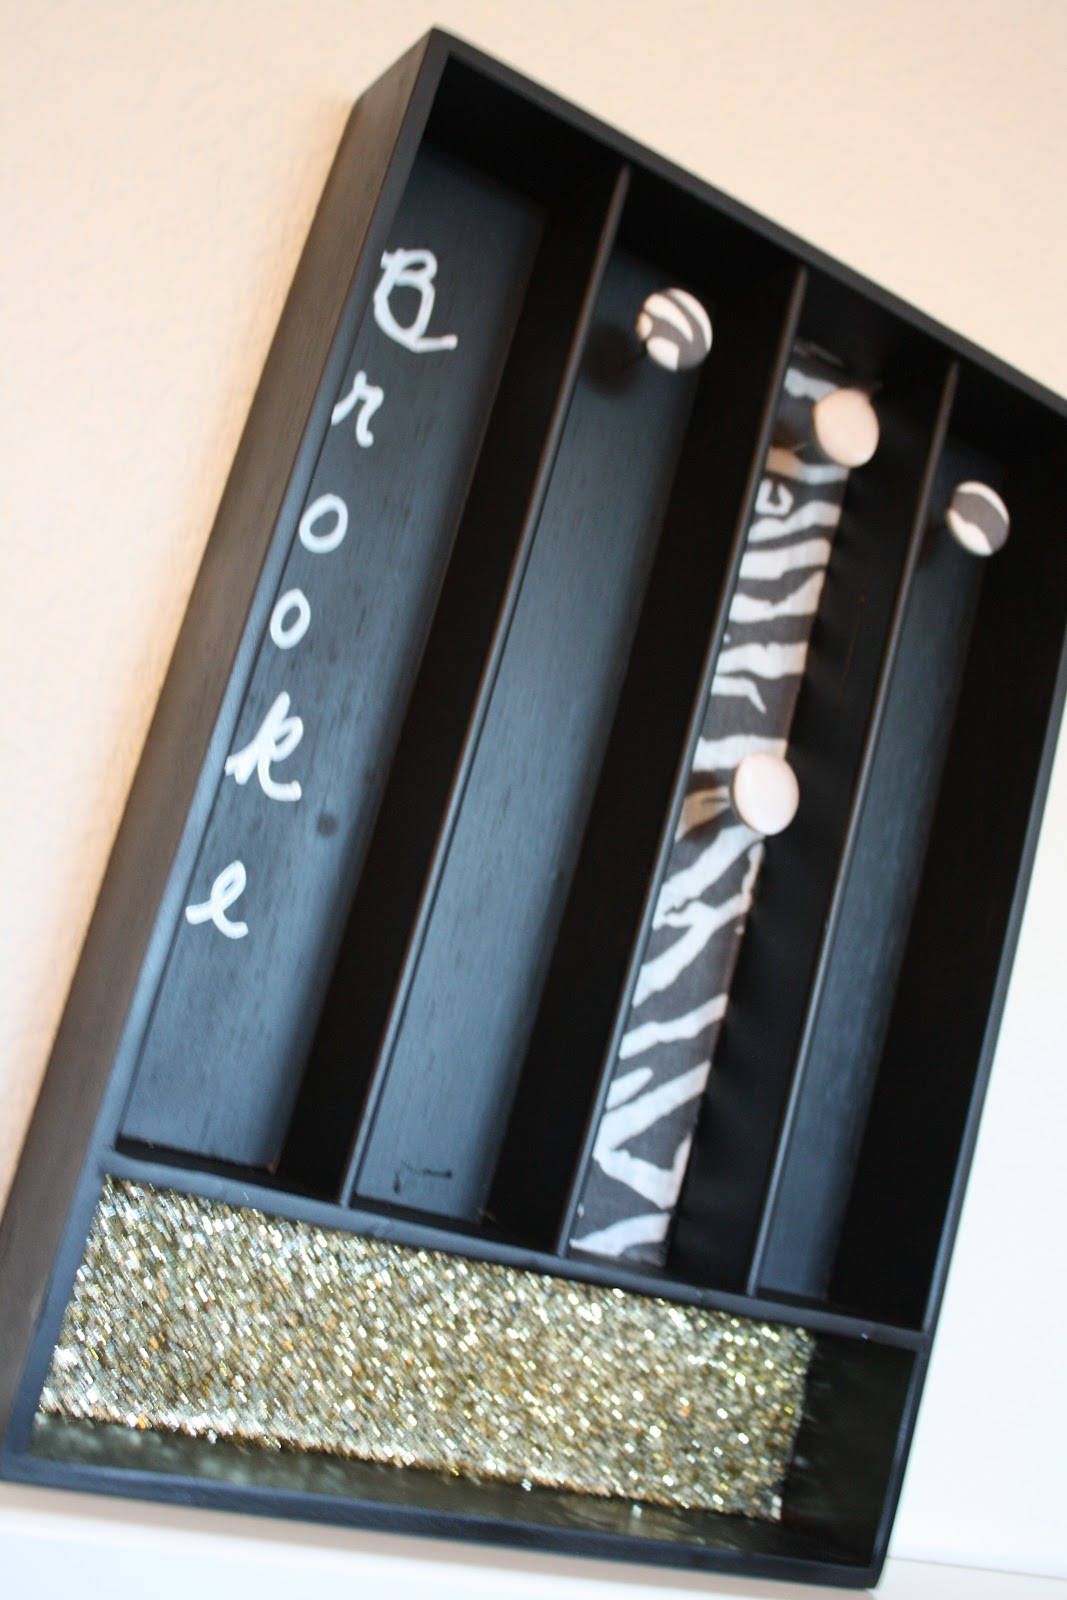
I knew I had better get to work making this Fab project! I picked up my bamboo cutlery tray at Walmart for $7.99. What a deal!!


I sprayed painted it with my handy can of chalkboard spray paint, you'll know why chalkboard and not just regular spray paint later...


Let it dry completely. I left it to sit overnight.


Now comes the fun part...GLITTA! I purchased a simple liquid Epoxy from the craft store. I only mixed up as much as  I would need and poured it into the bottom section of the tray. Next poor in the glitta color of your choice and gentle tip tray until area is covered. T&J used Mod Podge on this section, but I wanted my glitta to be encased so I wouldn't have to worry about it coming off in the shipping process. 


I dug around in my fabric scraps and found the perfect piece of zebra print cotton. Applied a coat of Fabric Mod Podge to the tray laid the fabric in and then applied another coat over the top. 


Using small nails I placed on them through out the tray for hanging necklaces and bracelets on. I didn't want just plan nails so I jazzed it up with covered buttons. {can you tell that the button on the first compartment wouldn't cooperate}


So I gave it the ax and wrote the recipients name in using a chalkboard pen.


Super cute and super sparkly!

Linking up with:


Creations by Kara


http://www.findingfabulousblog.com/Photobucket

How to Nest for Less


Pin It